Aluminum Window Installation: Key Steps and Common Problems
Before Installation: Check the Opening
Measure the rough opening first. You need a 10 to 15 millimeter gap on each side between the frame and the wall. This space allows for adjustment, insulation, and thermal expansion. Also, clean the wall surface. Dust, loose mortar, and uneven edges prevent proper sealing. Have all materials ready before you start—frame, fasteners, shims, foam, and sealant. Missing one item halfway through leads to shortcuts and mistakes.
Step One: Level and Shim
Place the frame into the opening. Use plastic shims under the sill and along the sides to level it. Check horizontal alignment on the sill. Check vertical alignment on both jambs. Measure the diagonals—both must match exactly. If they differ, the sash will never operate smoothly. A frame off by just a few millimeters now will show a visible gap later. This is one of the most common mistakes to avoid during aluminum window installation.
Step Two: Anchor the Frame
Secure the frame with fasteners suited to your wall type. Use expansion bolts for concrete, wood screws for timber, and self-drilling screws for steel. Space anchors no more than 600 millimeters apart, with one within 150 millimeters of each corner. Tighten gradually and recheck the level after every few fasteners. Uneven tightening can flex the aluminum profile and throw off your earlier alignment work.
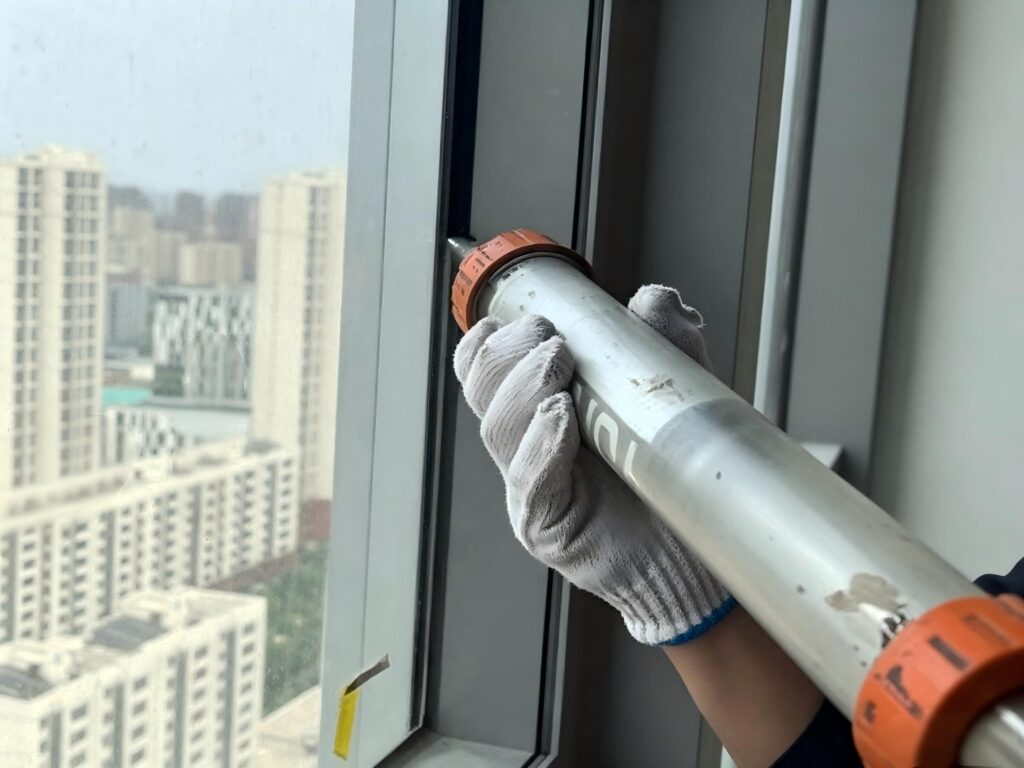
Step Three: Seal the Gaps
Fill the gap between frame and wall with low-expansion polyurethane foam. Apply it in layers and fill only two-thirds full—the foam expands as it cures. Once cured, trim the excess. Then apply a continuous bead of exterior-grade sealant around the outer perimeter. Any gap or pinhole in this bead lets water through and causes air leaks. On the interior side, seal or trim over the foam for a clean finish. Proper sealing is what separates a lasting aluminum window installation from one that fails within months.
Step Four: Install Glass and Sash
Set glass panels onto glazing beads with setting blocks at the bottom. Never let glass sit directly on aluminum. This creates pressure points that can crack the panel under thermal stress. Secure beads evenly without overtightening. Then hang the sashes and test each one. Open, close, and lock every panel. Movement should feel smooth, with no sticking or scraping. If something binds, go back and check your frame square and level.
Step Five: Final Checks
Test every moving part—handles, locks, hinges, and rollers. Run your hand along all seals to feel for drafts. Clear drainage slots on the outer sill so water can escape. Blocked drainage traps moisture inside the profile and leads to long-term damage. Finally, clean the glass and frames to spot any scratches or defects before you call the job done.
Common Problems to Watch For
If a sash sticks or drags, the frame is likely out of square. Re-check your diagonal measurements and adjust the shims. If you feel a draft around the edges, the sealant bead probably has a gap. Remove it and apply a fresh continuous bead. If water pools on the inner sill, check whether foam or debris has blocked the drainage slots on the outer frame. Each of these common problems traces back to a skipped step earlier in the aluminum window installation process.
Why Installation Quality Matters
A high-performance aluminum window only delivers results when installed correctly. Air leaks and water damage bypass even the best thermal break frame if the sealing fails. Take your time on leveling and sealing. At AlloyPro, our systems meet strict thermal and structural standards, but installation quality ultimately decides how they perform in your building.